AI Firewall Continuous Tests
This tutorial will guide you through how to get started with RIME by running AI Firewall Continuous Tests on a model trained over a slightly modified version of the IEEE-CIS Fraud Detection dataset.
AI Firewall Continuous Tests vs. AI Firewall Continuous Tests Trial
We offer two workflows for firewall monitoring. In the primary workflow (“RIME Firewall Continuous Tests”), the user selects their desired stress test run (corresponding to the model being deployed into production) from the UI to create a firewall. From there the user periodically uploads incoming production data to RIME.
We also offer a simpler trial workflow (“RIME Firewall Continuous Tests Trial”) to demonstrate firewall capabilities without requiring the user to upload a stress test run or create a firewall. This tutorial will provide examples for both workflows.
Running Firewall Continuous Tests on the Fraud Example
Running AI Firewall Continuous Tests Trial
To kick off a run of RIME Firewall Continuous Tests Trial using 5 days of sample data:
rime-engine run-firewall-trial --config-path examples/fraud_firewall/trial_five_day_config.json
(OPTIONAL) To kick off a longer run using 30 days of sample data:
rime-engine run-firewall-trial --config-path examples/fraud_firewall/trial_config.json
Running AI Firewall Continuous Tests
To kick off a run of RIME Firewall Continuous Tests:
Kick off a run of RIME Stress Testing (the reference dataset and model from this run will be used for the firewall).
rime-engine run-stress-tests --config-path examples/fraud_firewall/stress_testing_config.json
Go to the RIME web client, click on the “Default Project” and navigate to the “AI Firewall” tab on the left
 . You should see the following page.
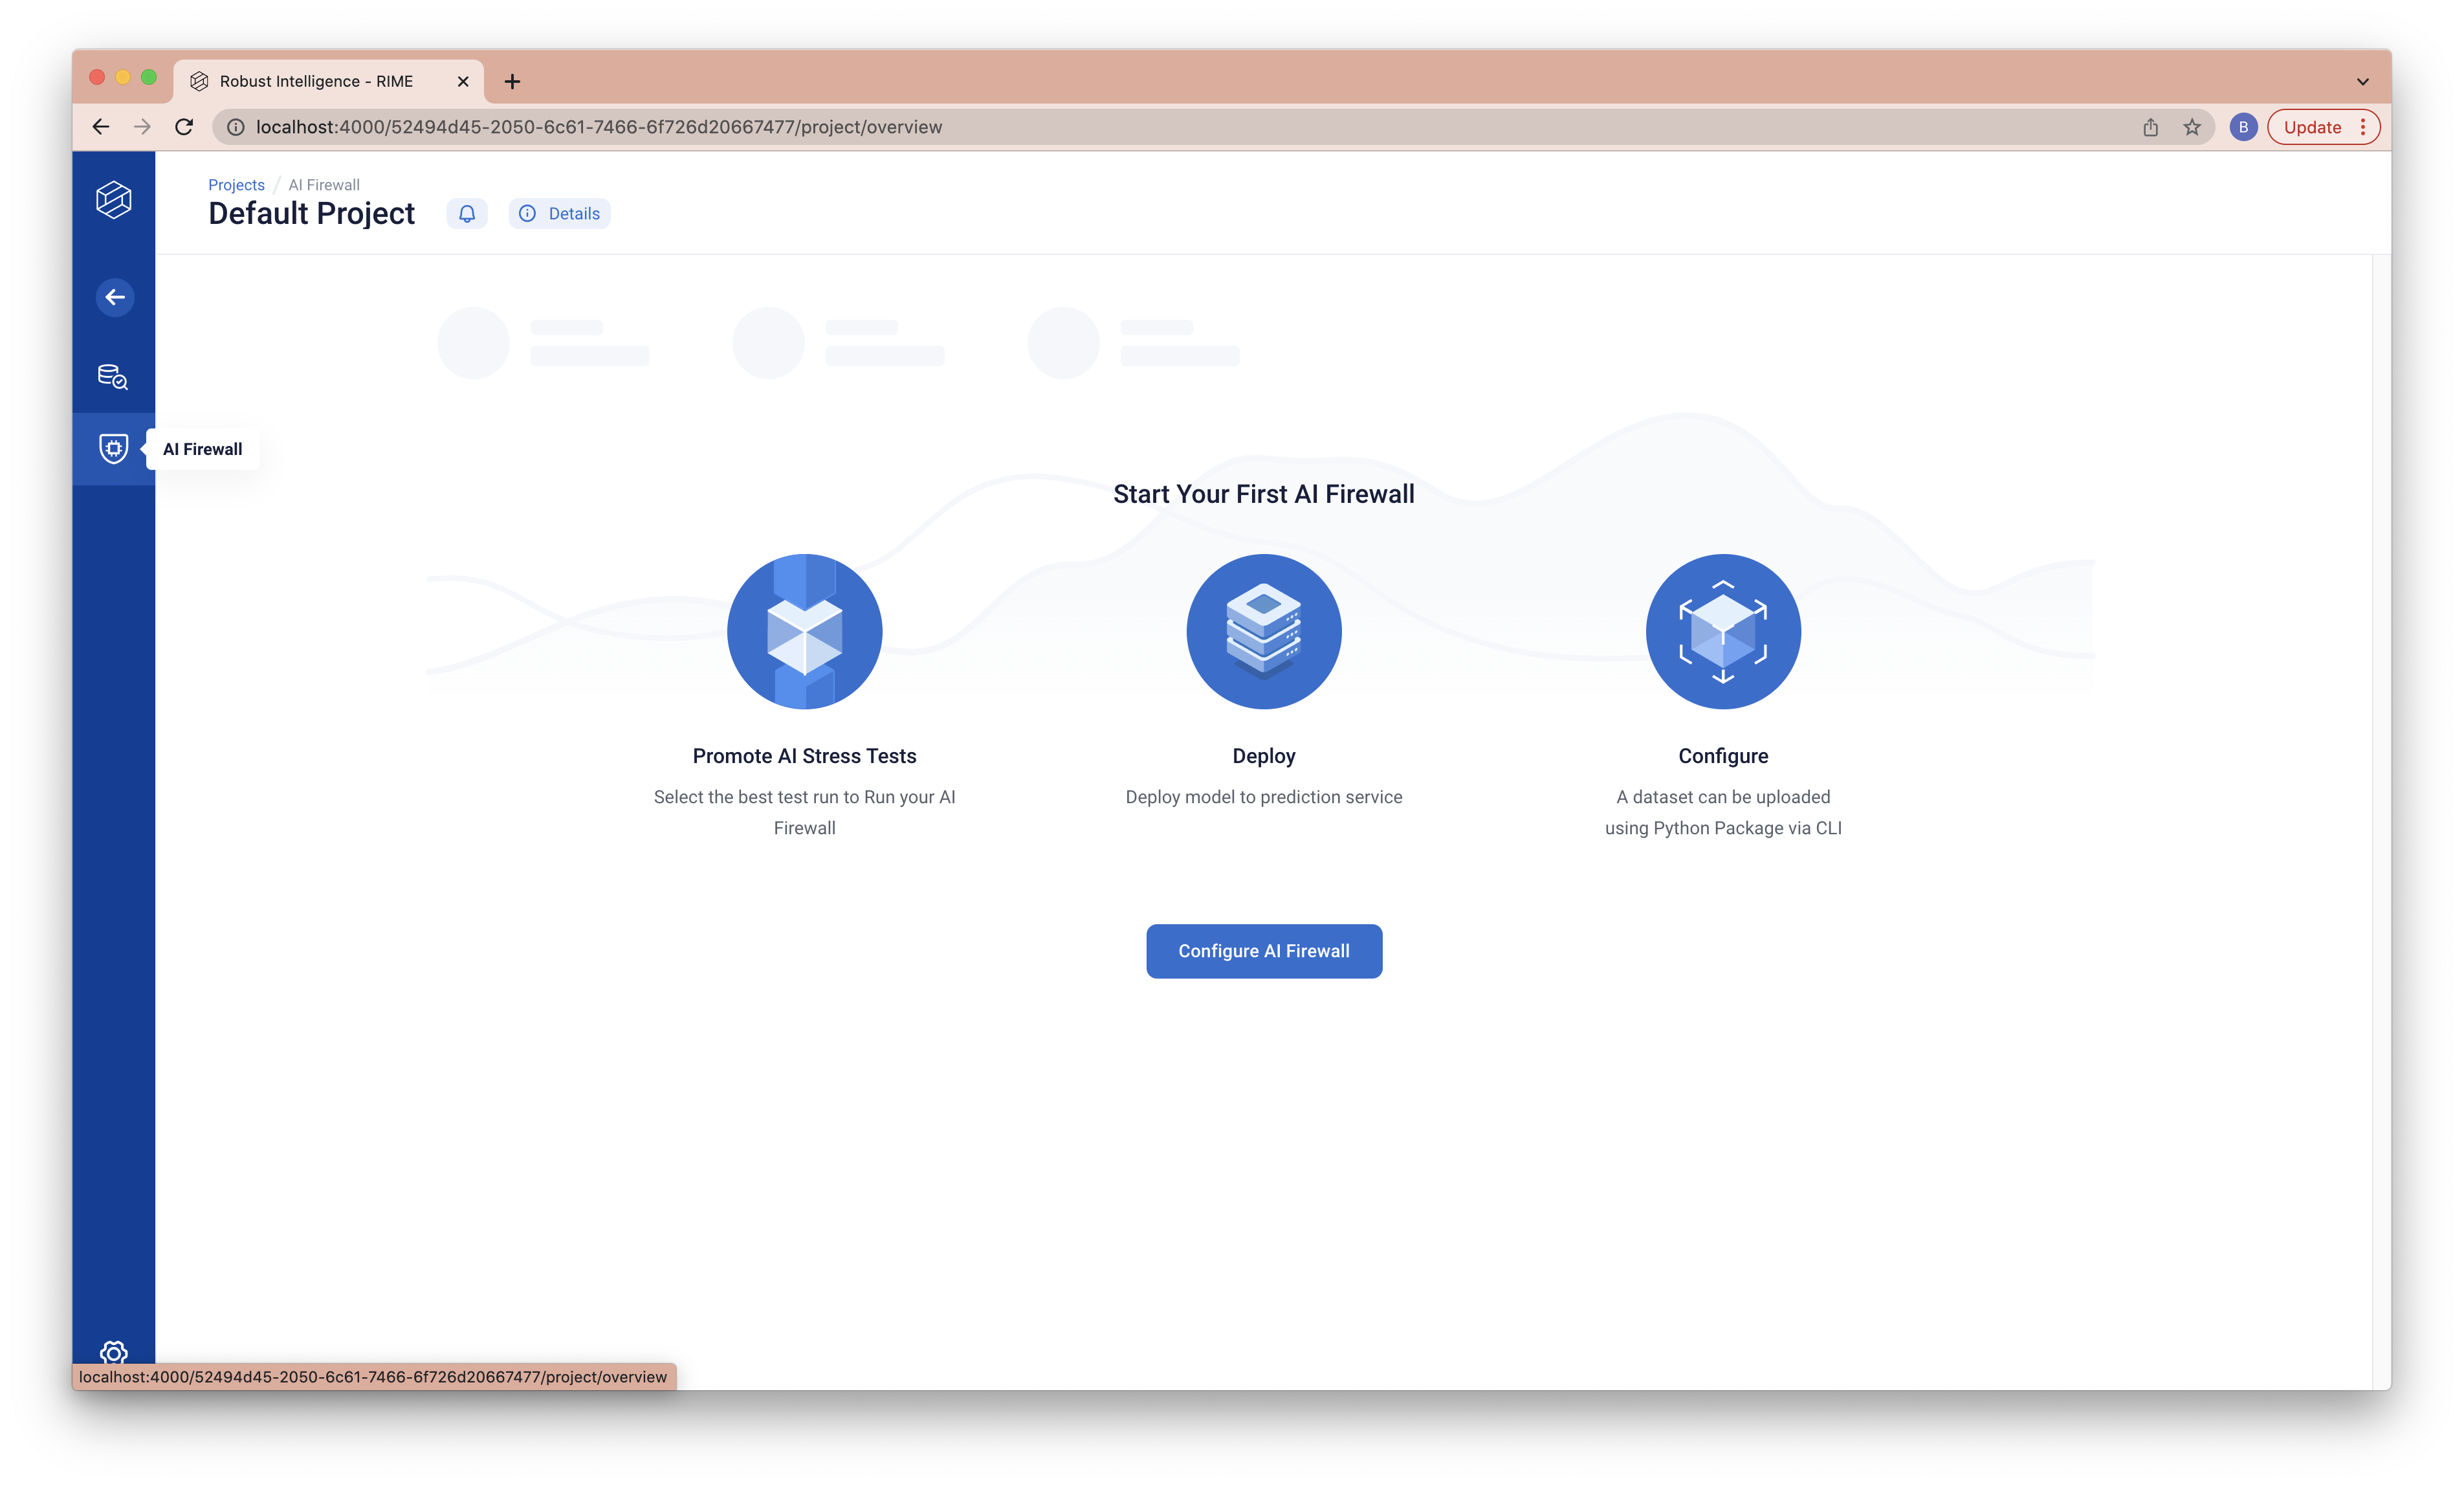
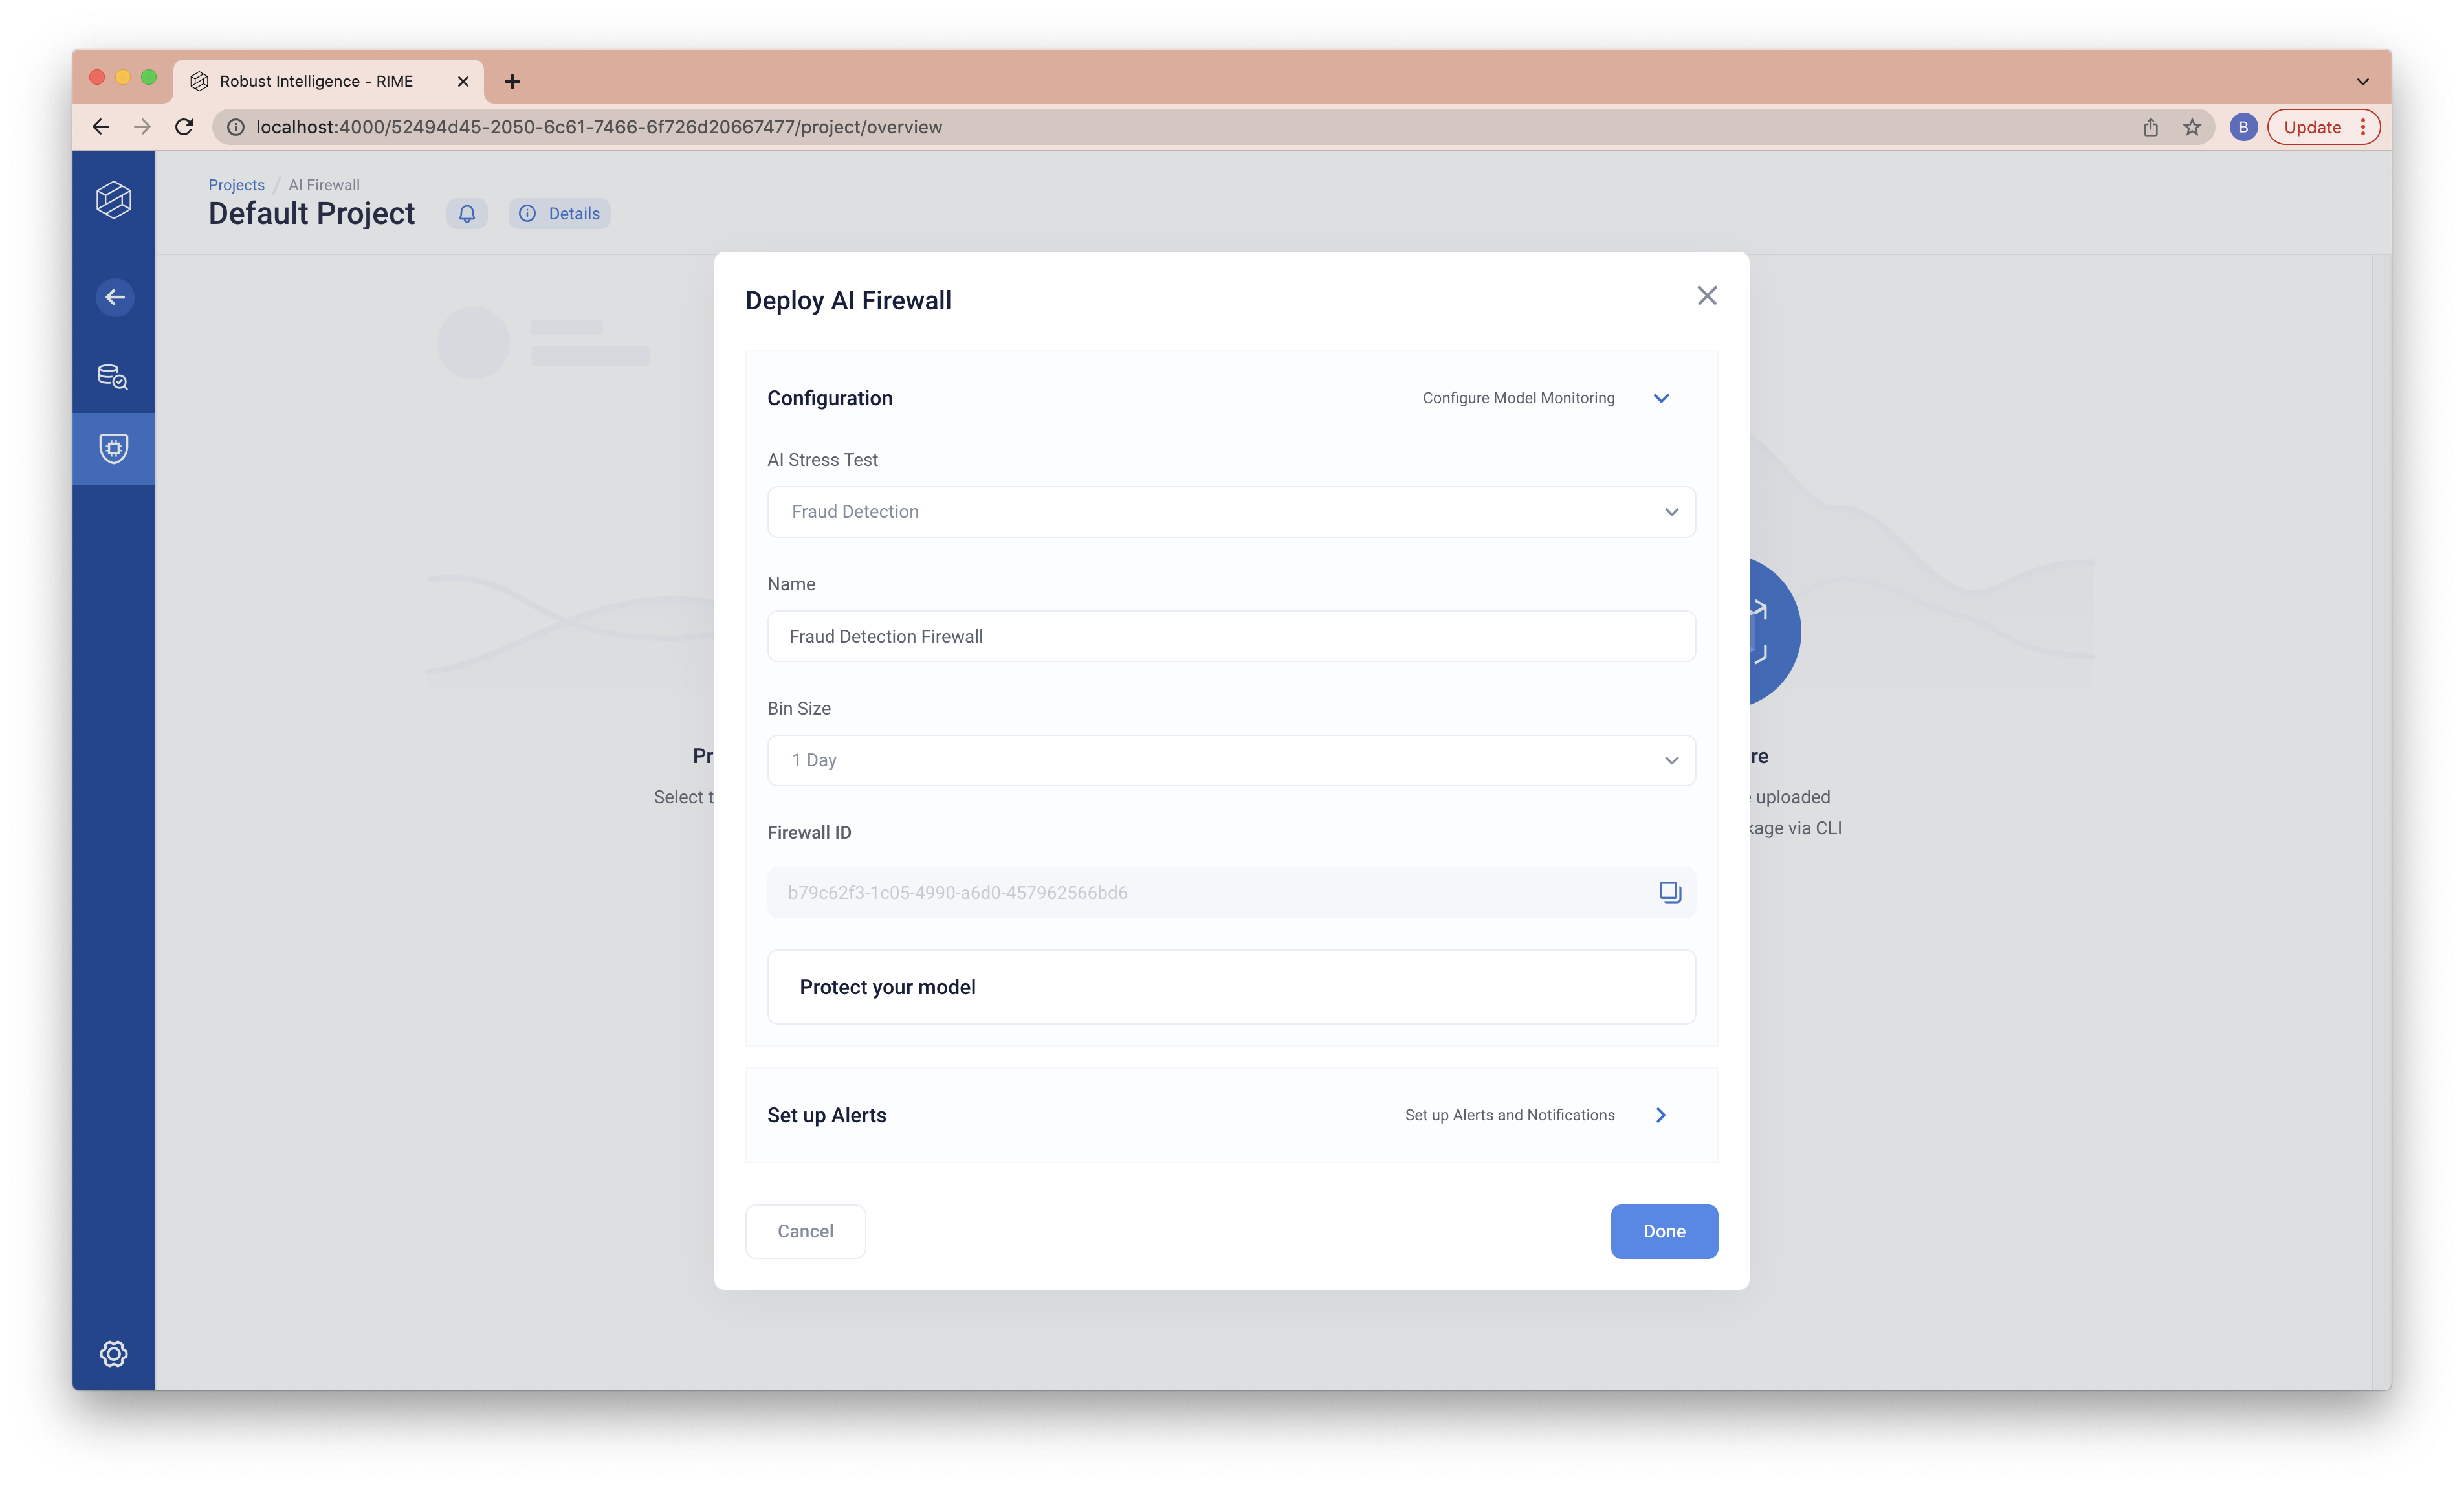
Click on “Configure AI Firewall” and fill out the details. The “Name” field can be a name of your choice. The “AI Stress Test” field should be “Fraud Detection” (this refers to the AI Stress Testing run that we just ran). Finally, the “Bin Size” field should be “1 Day”. Once you’ve filled everything out, you should record the “Firewall ID” (you will need this later to upload data and predictions to monitor) and click “Done”.
We can now upload data and predictions and run AI Firewall Continuous Tests. The following command runs firewall continuous tests on data and predictions from April 29th, 2021.
rime-engine run-firewall --config-path examples/fraud_firewall/firewall_2021_04_29_to_2021_04_30_config.json
To add another data from different day, run the same command with a config for a different day.
rime-engine run-firewall --config-path examples/fraud_firewall/firewall_2021_04_30_to_2021_05_01_config.json
Data and predictions from multiple bins (multiple days in this case) can be uploaded together. It will be split automatically and firewall continuous tests will be run on each time period. For example, the following uploads data and predictions from April 1st, 2021 until April 29th, 2021.
rime-engine run-firewall --config-path examples/fraud_firewall/firewall_2021_04_01_to_2021_04_29_config.json
Viewing results
After this finishes running, you should be able to see the results in the web client, where they will be uploaded to the Default Project. For a full guide to what you are seeing, please see our UI Documentation.
For additional command line options, please see the CLI Reference.
Running Firewall Continuous Tests on your own Data and Model
This guide will cover how to run AI Firewall Continuous Tests on your own data and model.
Collect Data in the Correct Format
For AI Firewall Continuous Tests Trial, RIME expects two datasets. Each dataset must be passed in as a csv or parquet file where each column is a separate feature. The first dataset is the reference dataset. The second dataset is the evaluation dataset which REQUIRES a datetime column and will be split into slices based on that column. RIME will run tests comparing each slice to the reference dataset. For AI Firewall Continuous Tests, RIME expects a firewall ID (obtained from the firewall page in the RIME web client) and an evaluation dataset (which again REQUIRES a datetime column).
AI Firewall Continuous Tests Trial and AI Firewall Continuous Tests REQUIRE predictions for each datapoint. In the case of AI Firewall Continuous Tests Trial, these should be passed in as a column in both datasets. In the case of AI Firewall Continuous Tests, these should be passed in as a column in both the reference dataset of the relevant AI Stress Testing and in the evaluation dataset.
Create configuration
With your data ready, you can now create a configuration file for AI Firewall Continuous Tests or AI Firewall Continuous Tests Trial. For a detailed reference on what the configuration should look like, see AI Firewall Continuous Tests Configuration Reference and AI Firewall Continuous Tests Trial Configuration Reference.
Run the CLI
You can run the CLI for AI Firewall Continuous Tests Trial, pointing it to the configuration file created in the above step, with:
rime-engine run-firewall-trial --config-path <PATH-TO-CONFIGURATION>
For AI Firewall Continuous Tests, you will need to obtain a Firewall ID. Please see the example above for detailed instructions on how to do so. You can then run the CLI, pointing it to your Firewall ID and the configuration file created in the above step, with:
rime-engine run-firewall --firewall-id <FIREWALL-ID> --config-path <PATH-TO-CONFIGURATION>
After this finishes running, you should be able to see the results in the web client, where they will be uploaded to the Default Project. For a full guide to what you are seeing, please see our UI Documentation.
For additional command line options, please see the CLI Reference.
Troubleshooting
If you run into errors running this walkthrough, please reference the RIME Python Package section of our FAQ. Additionally, your RI representative will be happy to assist–feel free to reach out!